Some WordPress sites use a plugin called Advanced Custom Fields (ACF) to build blog posts. ACF lets a site create custom layouts instead of using WordPress's normal editor.
Here's why this matters to us: our app publishes posts from our own editor straight into WordPress. If a site uses ACF for its blog layout, we need to know that before we publish. Otherwise, our content might not show up the way it's supposed to.
This guide walks you through three checks, in order:
Does this site actually use ACF for blog posts?
What "post type" is the blog using?
What "field groups" does ACF need filled in?
Objectives
By the end of this guide, you'll have three things for a given site:
Confirmation of whether the blog posts actually use ACF
The custom post type key, if the blog uses one
The custom field keys ACF needs filled in
These three items are what you'll enter into the site connection in Step 4.
Step 1: Check If ACF Actually Applies to Blog Posts
Just because a site has the ACF plugin installed doesn't mean it's used for blog posts. Sites often use ACF for other things, like:
Page builders
Other content types, like "Products" or "Team Members"
Site-wide settings, like headers, footers, or theme options
So before doing anything else, we need to confirm ACF is actually shaping this blog's layout.
How to check (in the WordPress admin)
Open a blog post and try to edit it.
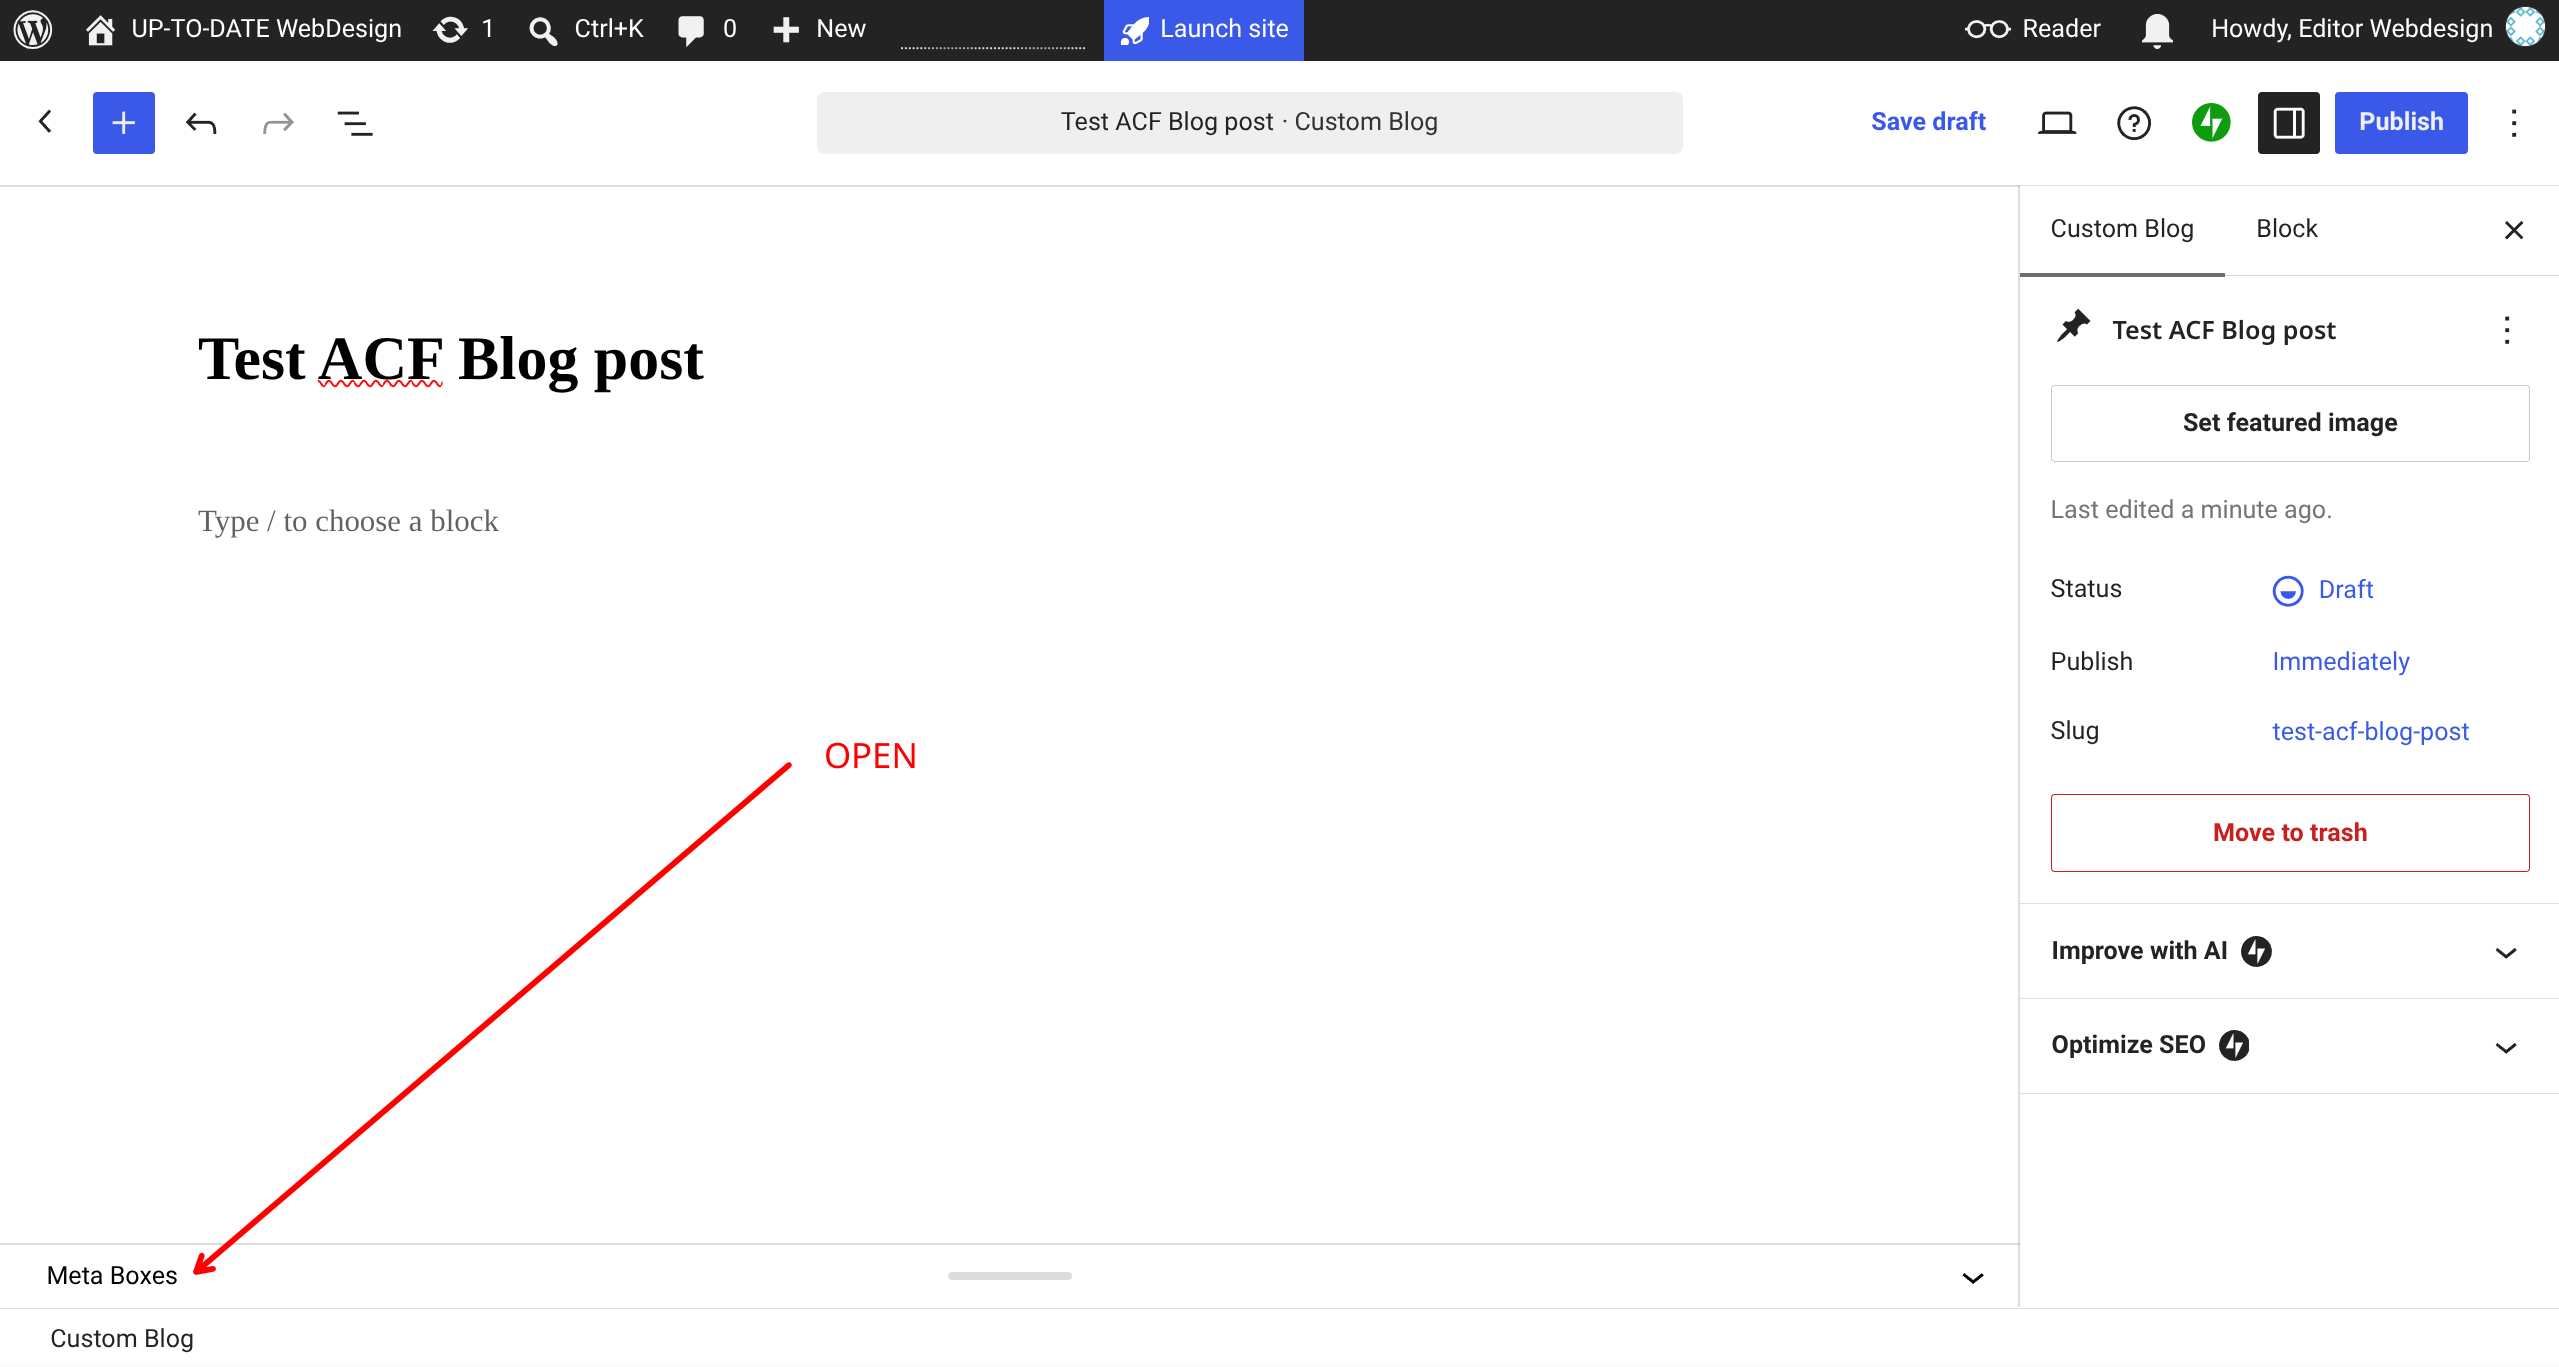
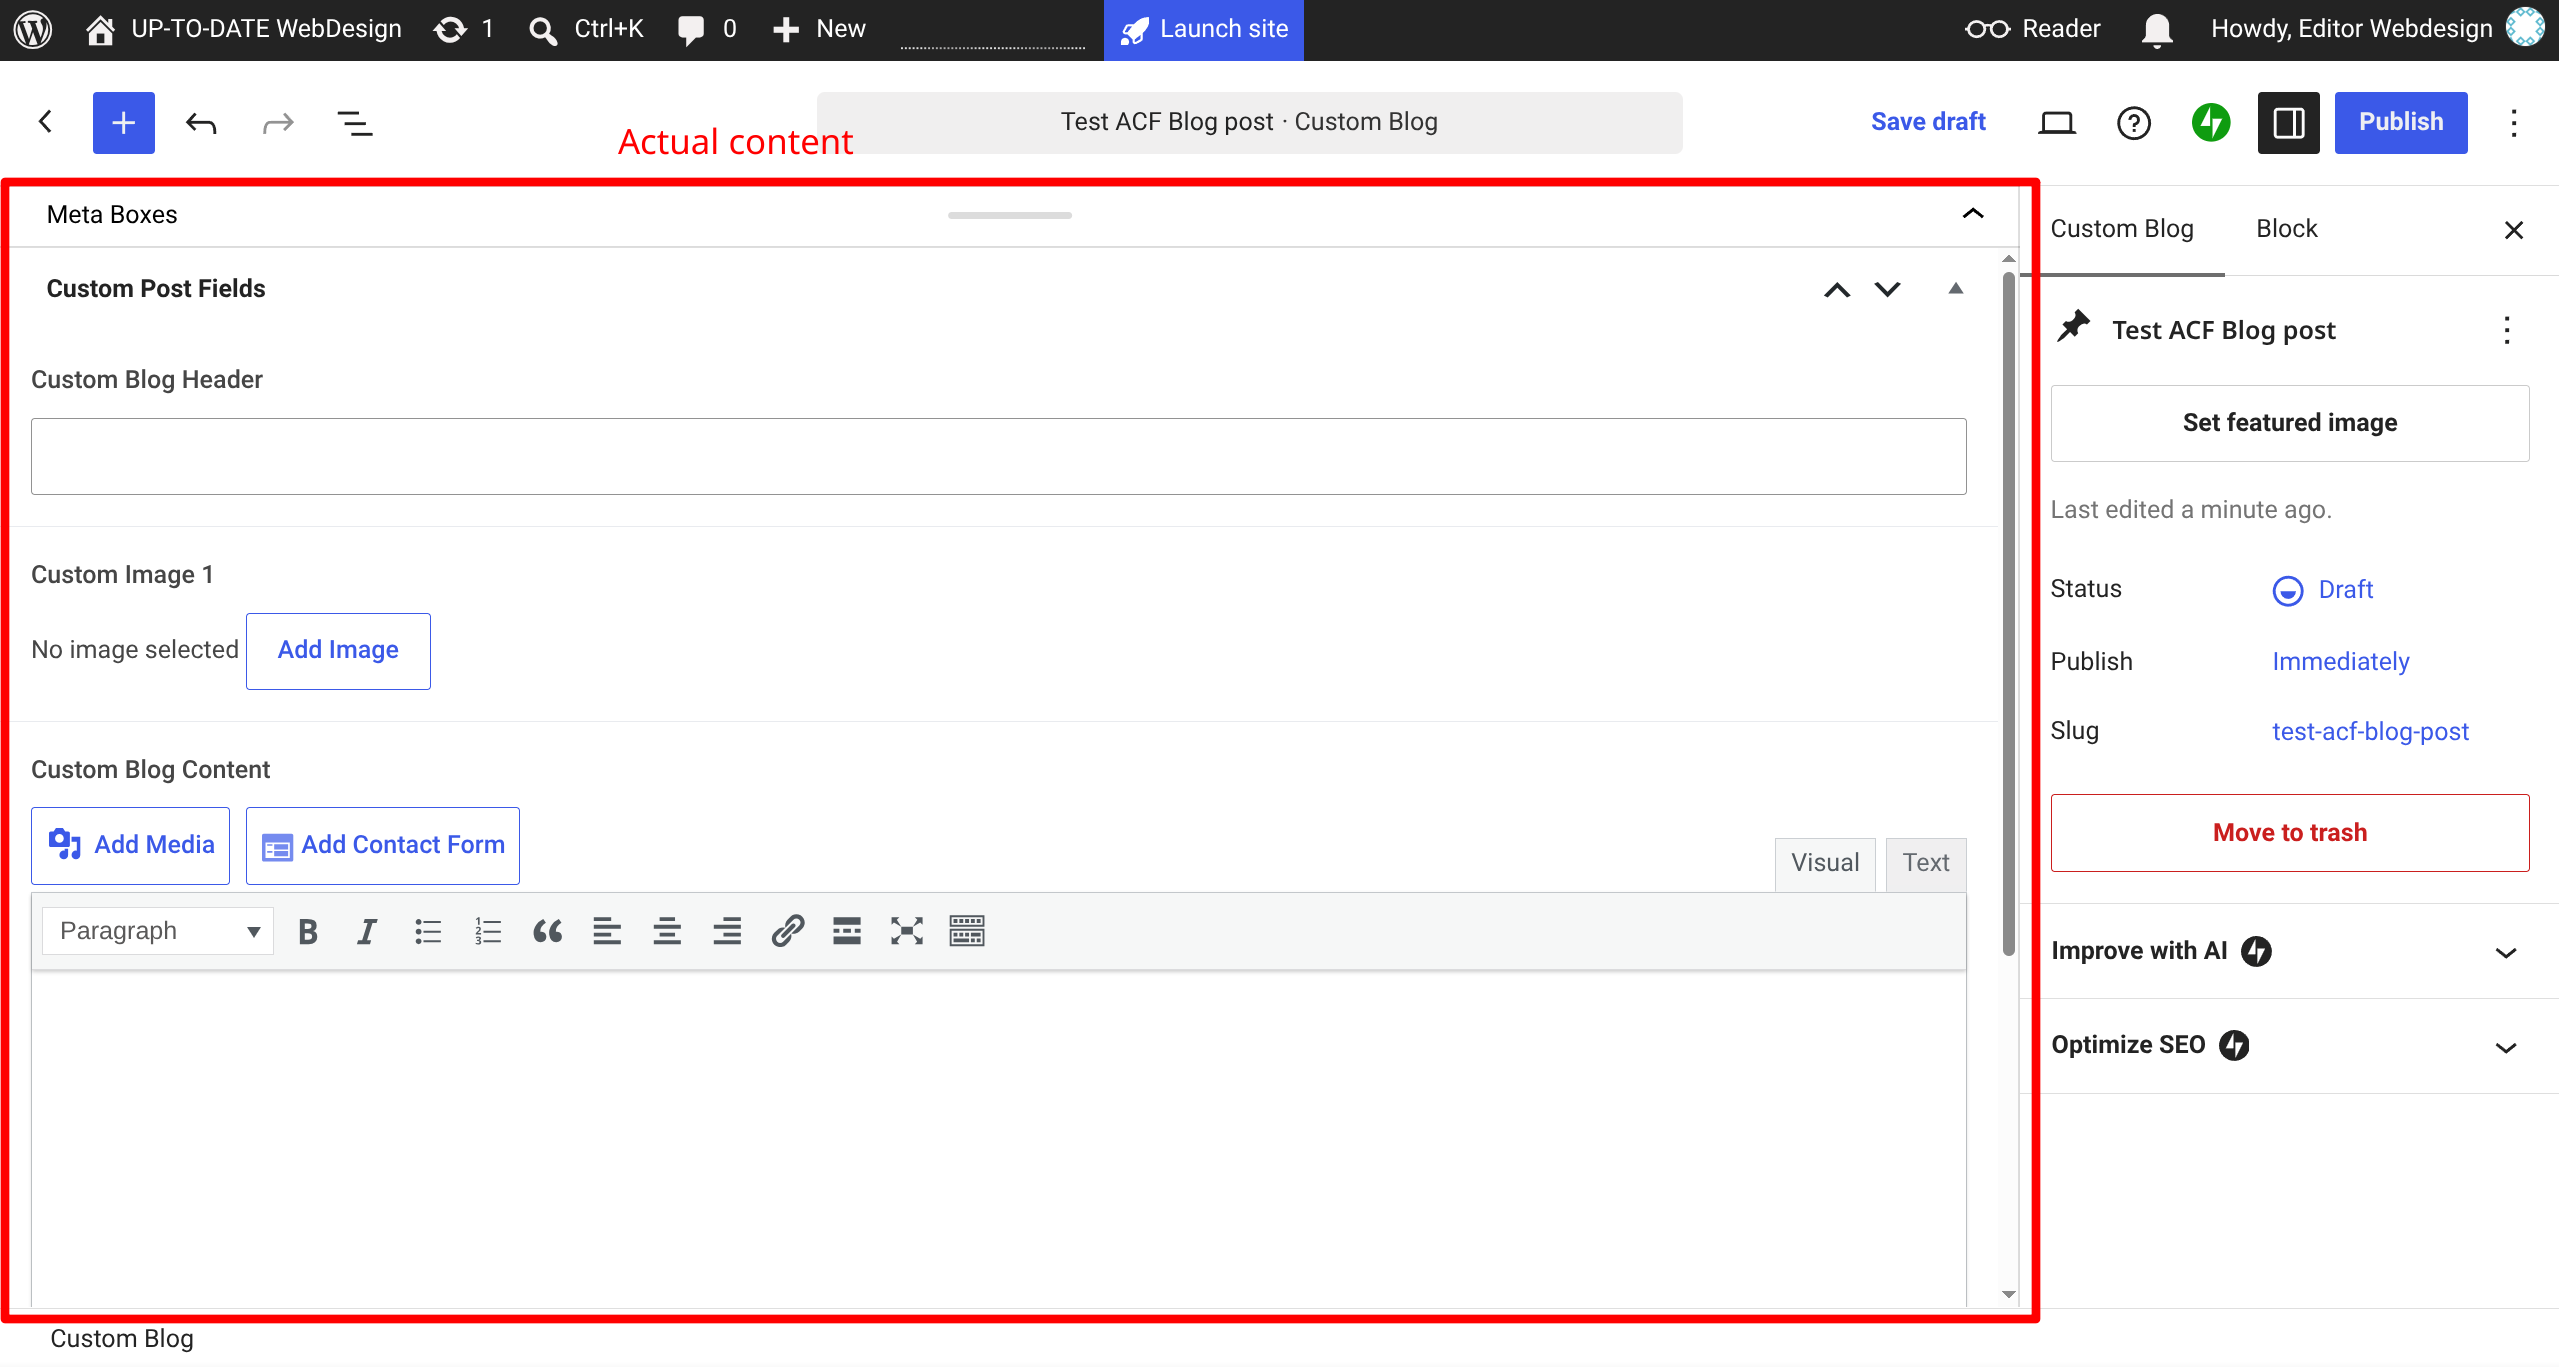
Is the main content box empty, or greyed out and disabled? If so, the real content is probably stored in ACF fields, not in WordPress's normal content area.
Do you see extra boxes above, below, or beside the normal editor? Things like grouped fields, image upload buttons, repeating sections, or a "Flexible Content" builder? If yes, ACF is active on this post type.
Look for the "Custom Fields" menu in the left-hand sidebar of the WordPress admin.
If it's there and shows field groups, ACF is installed on the site.
But this alone doesn't prove it's used for blog posts. Keep checking.
Check a few different posts, not just one.
Some sites only use ACF for featured posts, landing-page-style posts, or posts in one specific category. Regular posts might still use the normal editor.
The simple rule of thumb
Normal-looking content in the standard editor? ACF (if it's there) is probably being used for something else, not this blog post.
Content missing or sparse in the standard editor, but the live page looks fully designed? ACF is driving the layout, and you'll need to work with it.
Step 2: Figure Out the Post Type
Not every blog post is just a "Post" in WordPress. Some sites build their blogs using custom post types instead, like "Reviews," "Case Studies," or "Products," that are then displayed in a blog-style feed.
Why does this matter? Because ACF field groups are tied to specific post types. You need to know the post type before you can find the right fields.
How to find the post type
Check the left-hand admin menu. Custom post types usually get their own menu item (like "Reviews" or "Portfolio"), separate from the default "Posts" menu.
Check "Screen Options" in the top-right corner of the edit screen. This can reveal extra taxonomies and fields tied to that post type, which is a good sign it's custom.
Look at the public URL structure. Regular posts usually live at
/blog/post-name/or/post-name/. Custom post types often get their own base, like/reviews/post-name/.Inspect the page, find the element that contains the
post-singleclass. Alongside it, you can find the post type such astype-my_custom_post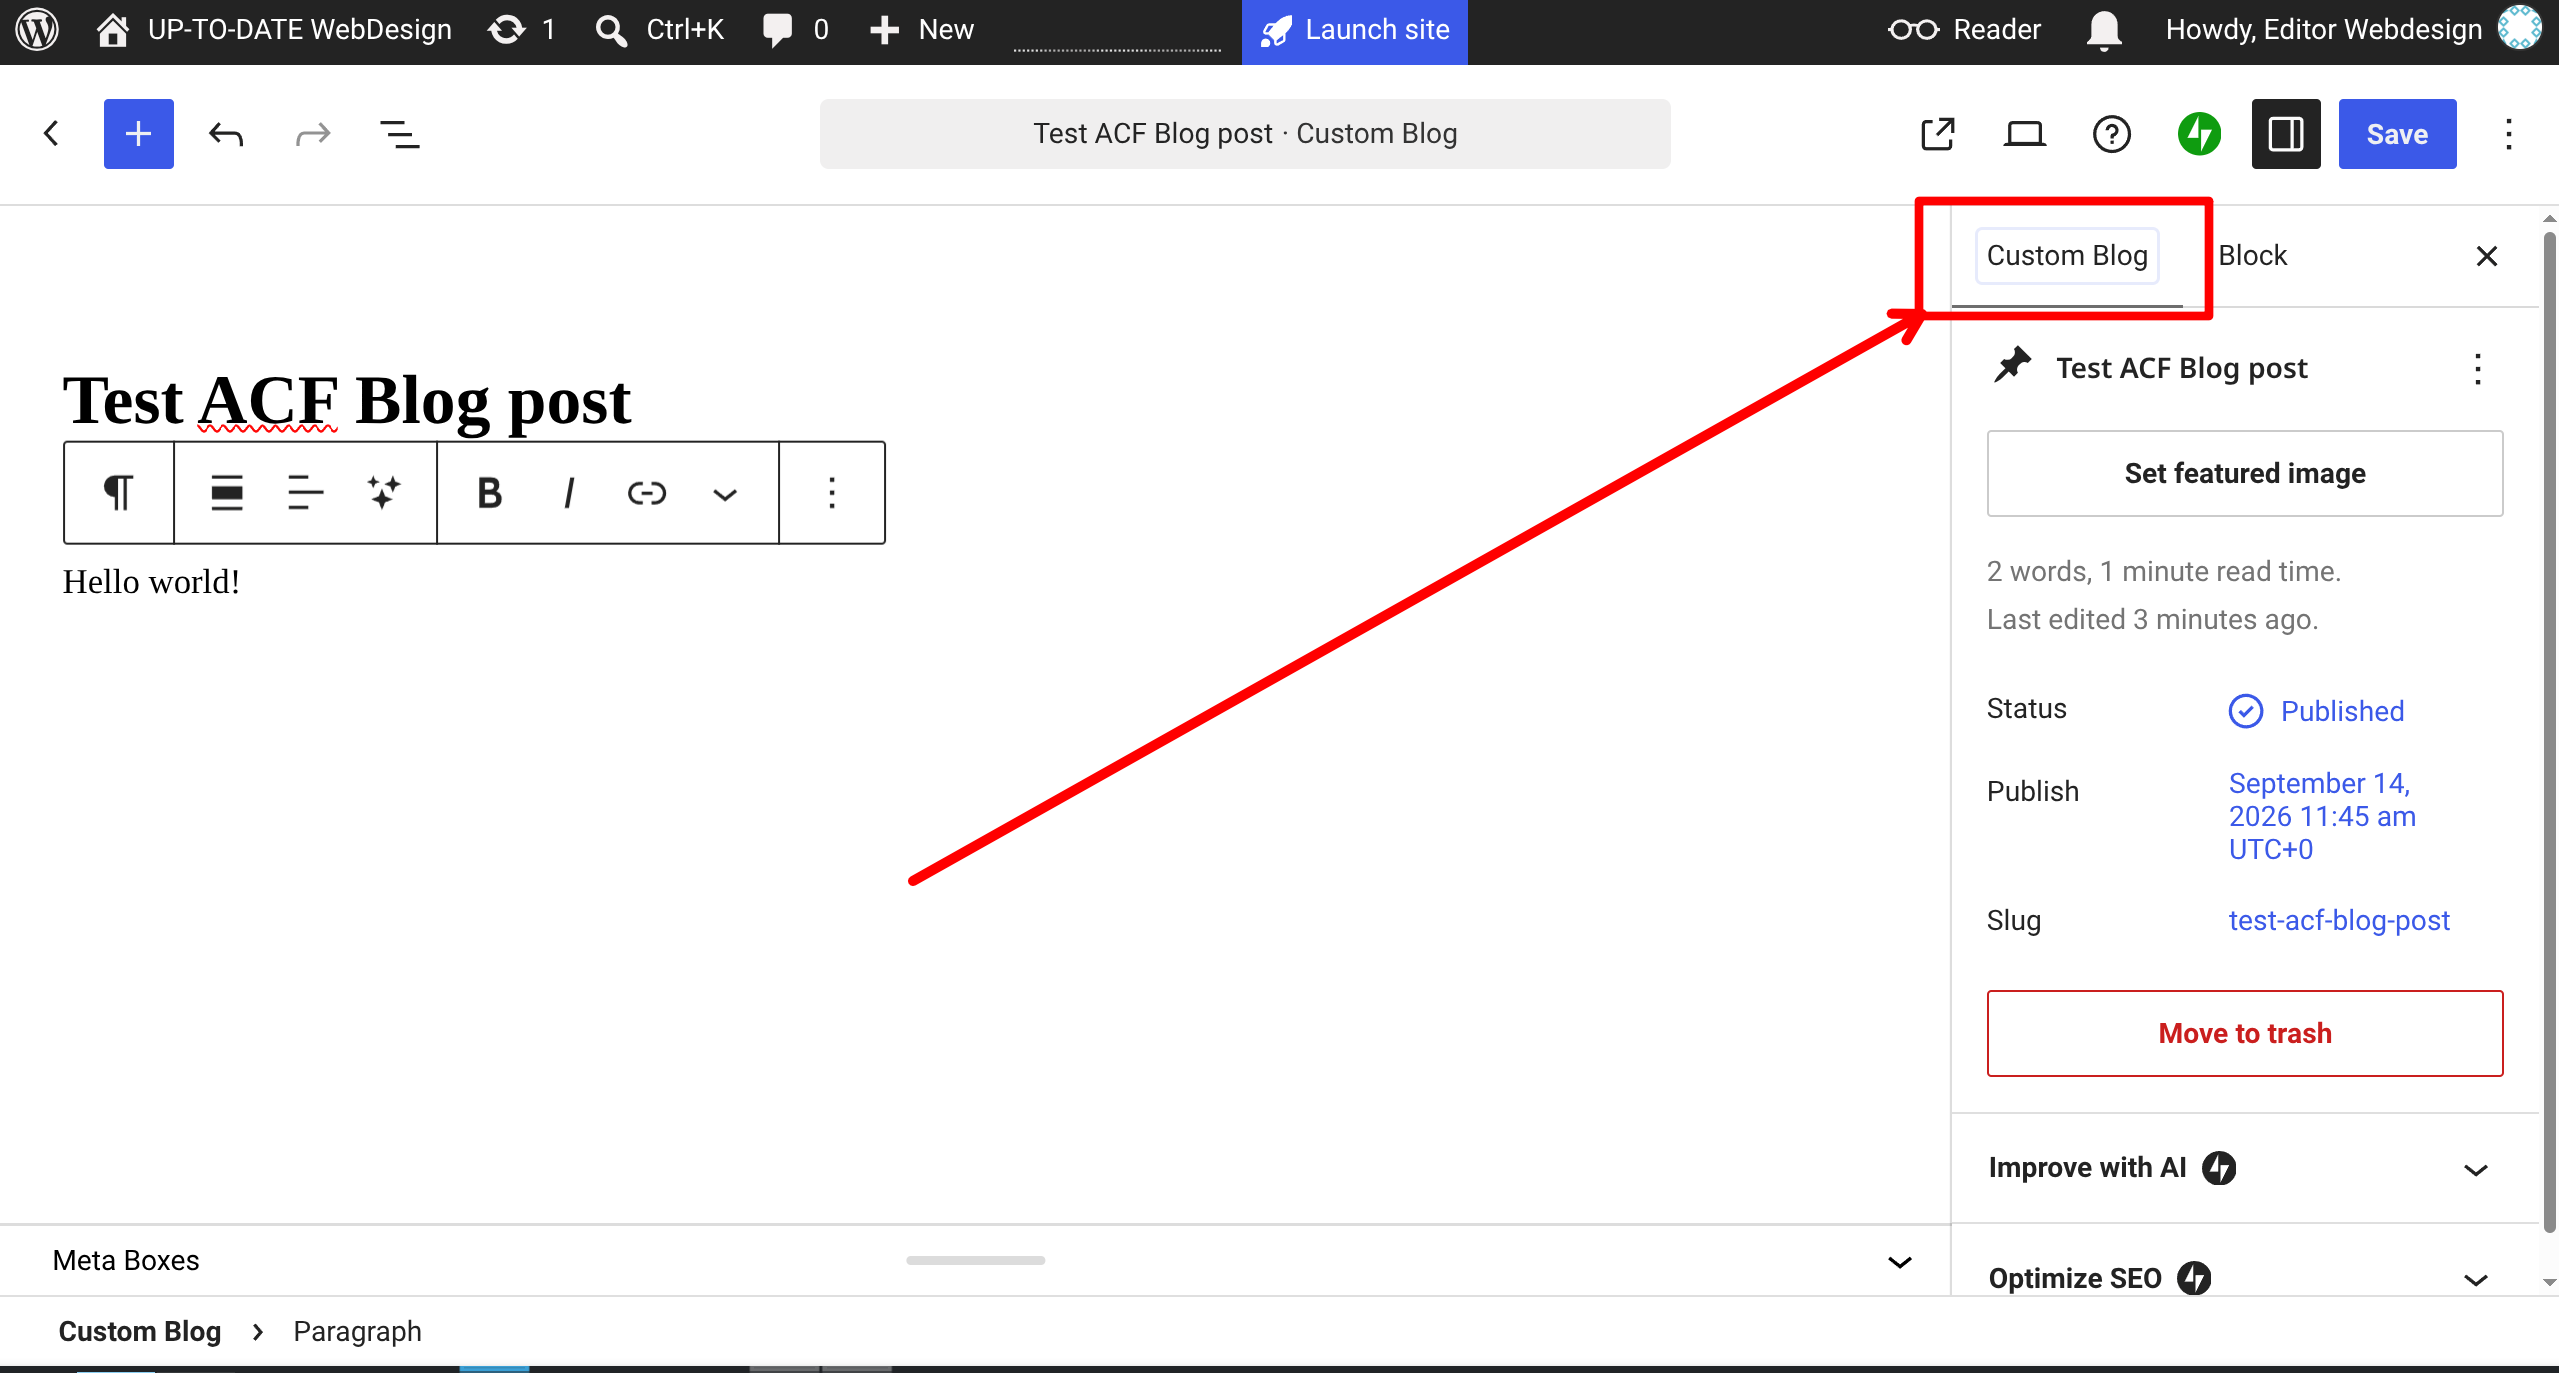
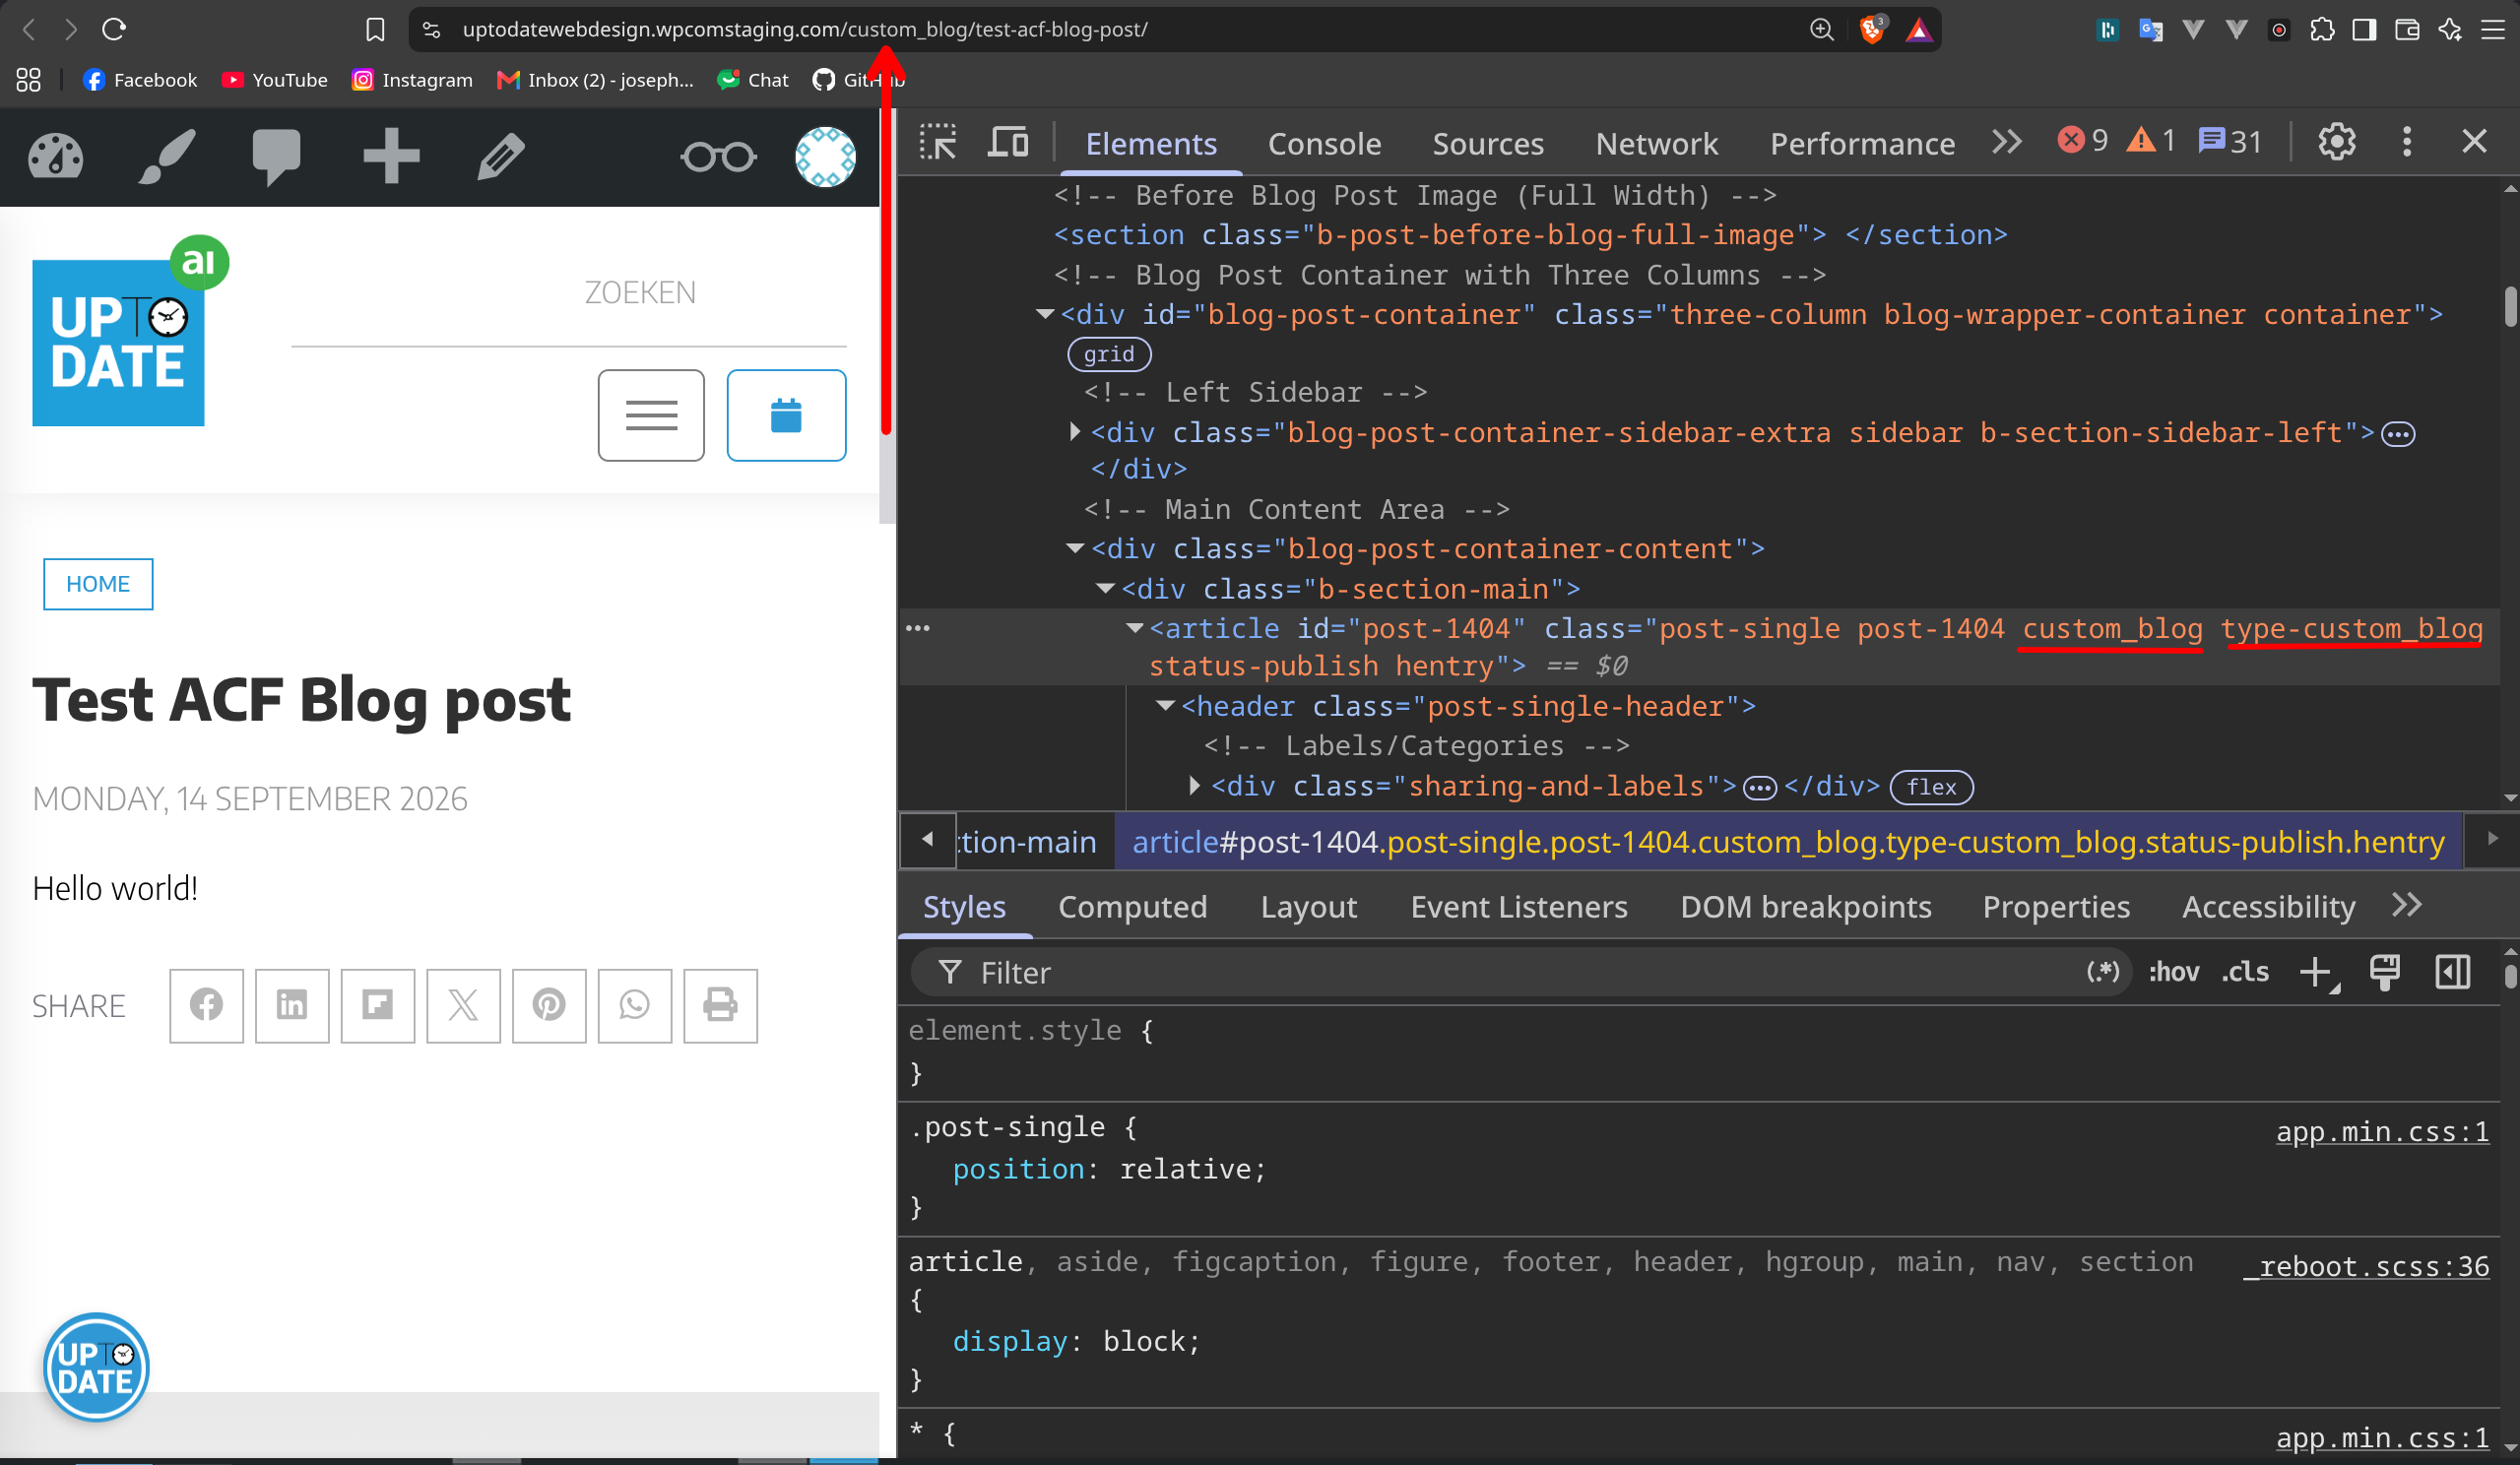
Step 3: Find the Field Groups
Once you know the post type, the next step is finding which field groups apply to it.
ACF field groups aren't automatically attached to every post. They're connected to specific post types (and sometimes specific templates, categories, or even individual posts) through location rules. You need to know these rules to know which fields you're actually working with.
How to find them
Go to Custom Fields > Field Groups in the WordPress dashboard.
Open each field group and scroll to its Location Rules, usually at the bottom of the screen. This tells you exactly which post type(s), templates, or categories trigger that field group to show up.
Write down the structure of each field group:
Field labels (what the editor sees)
Field names or keys (what the code/API actually uses)
Field types
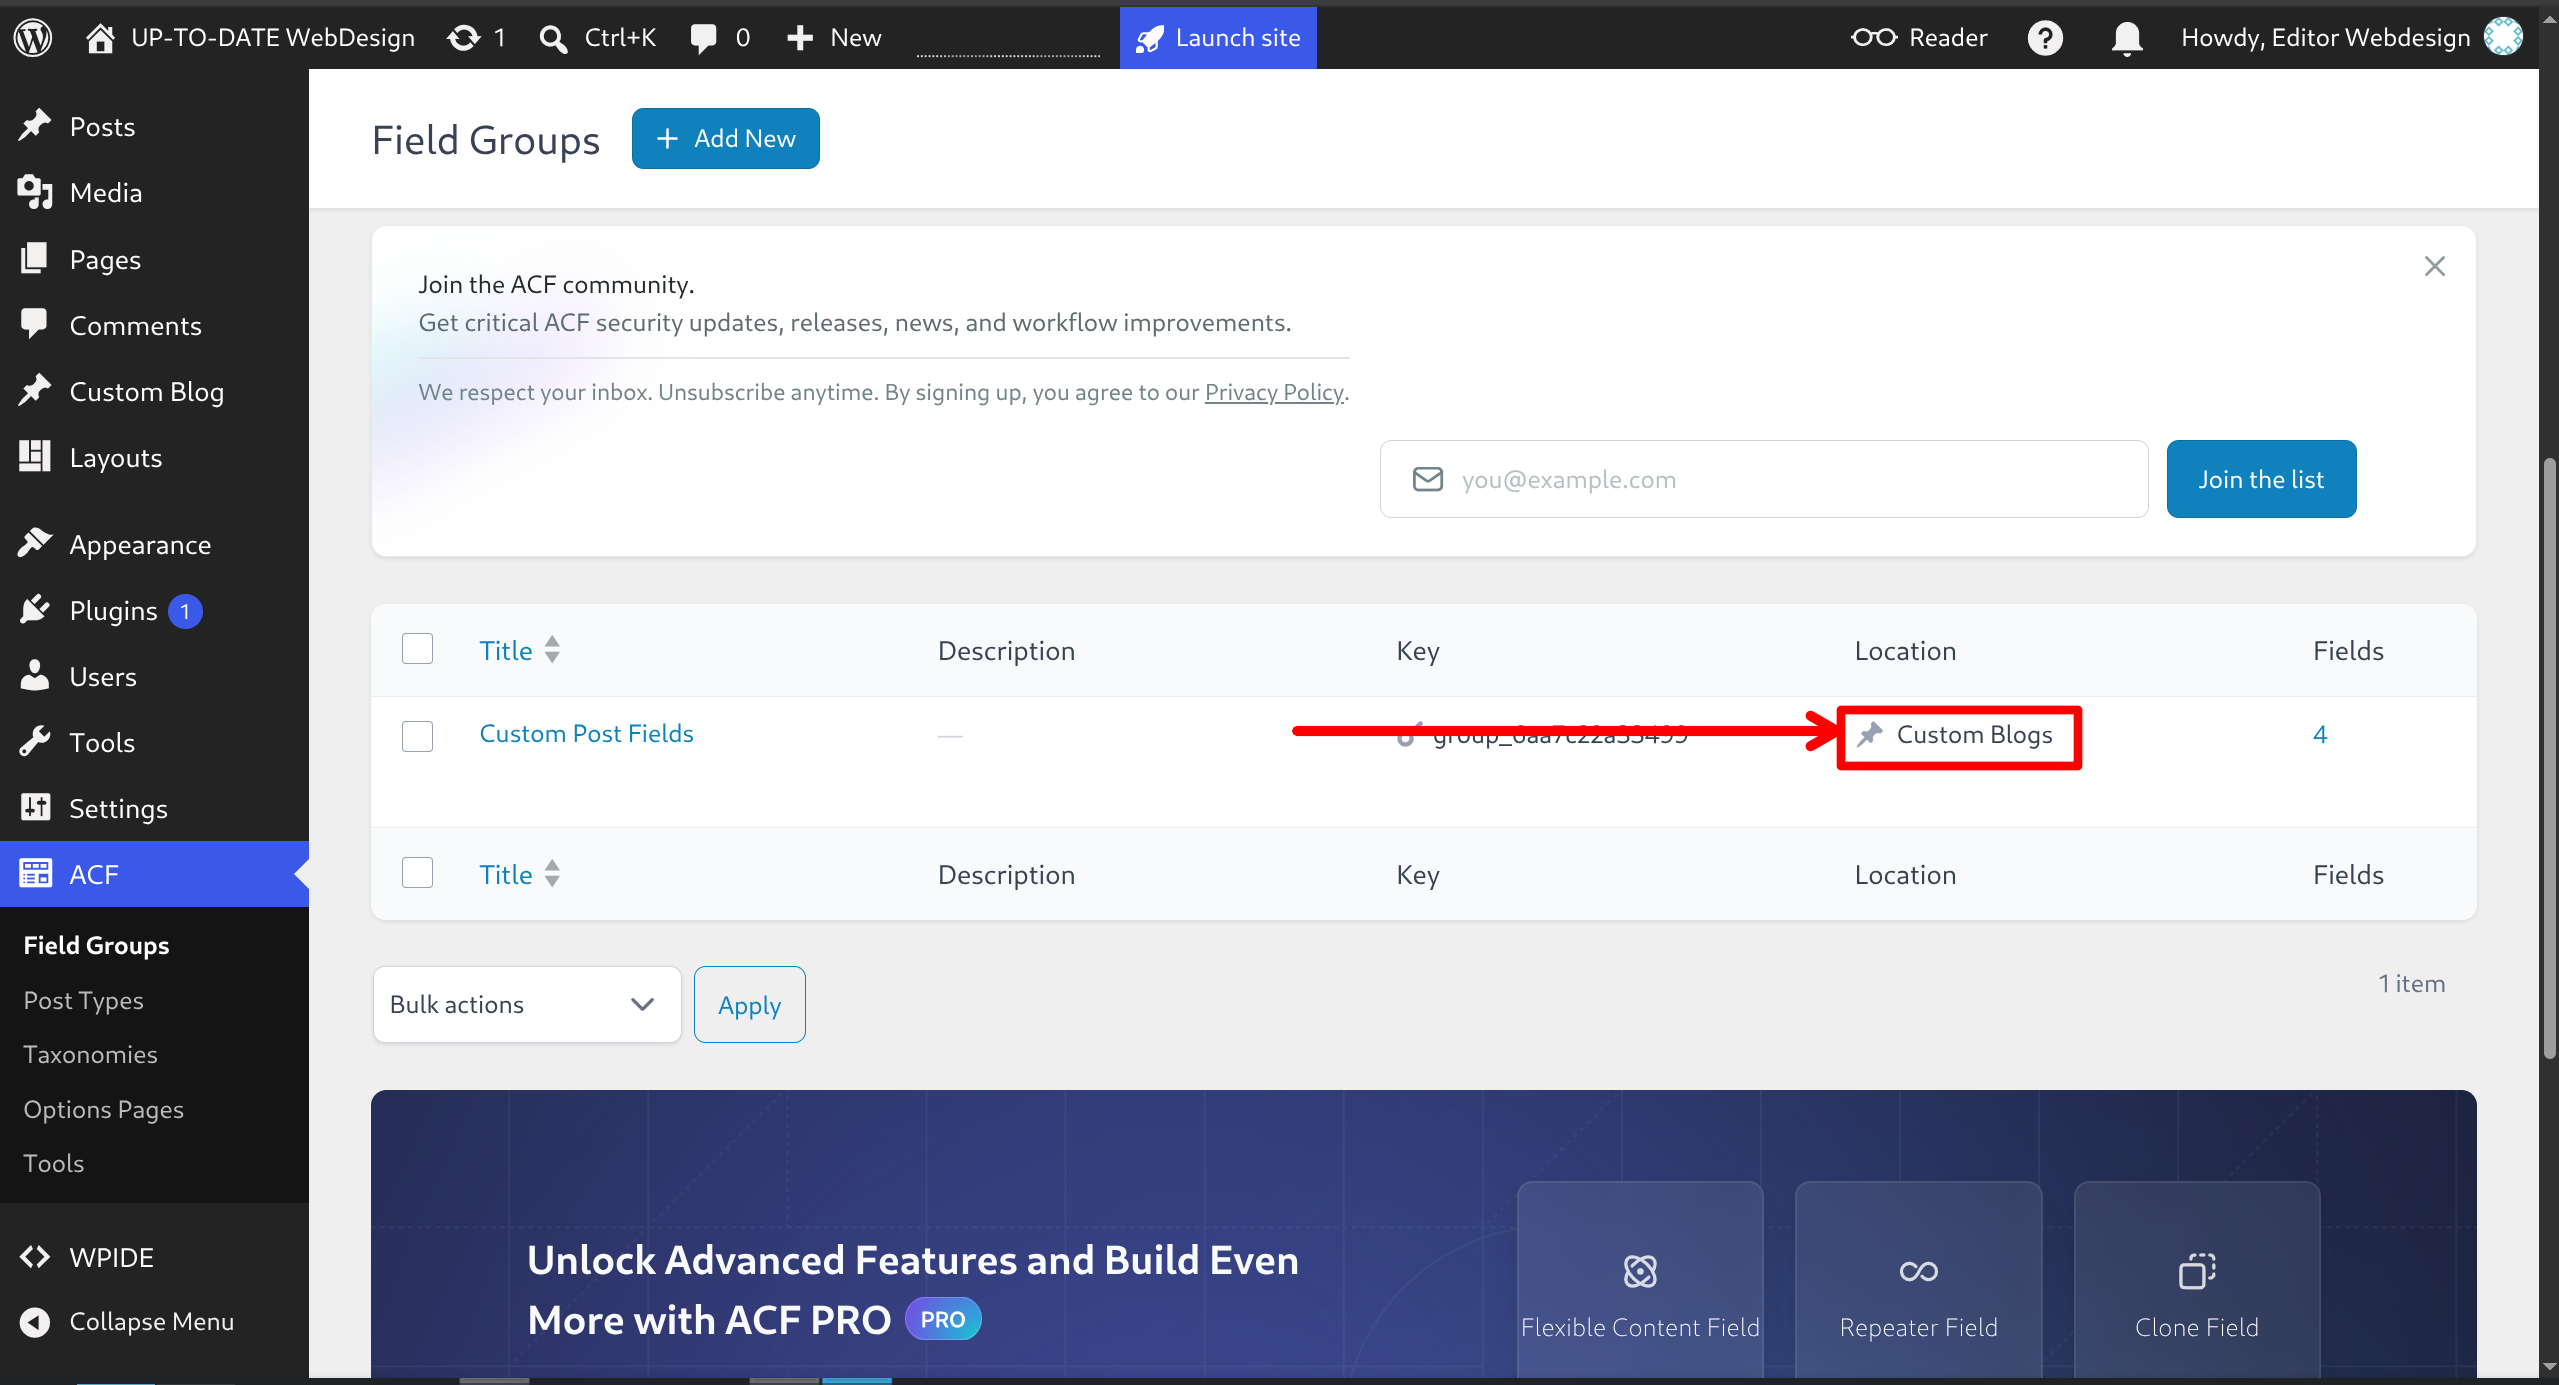
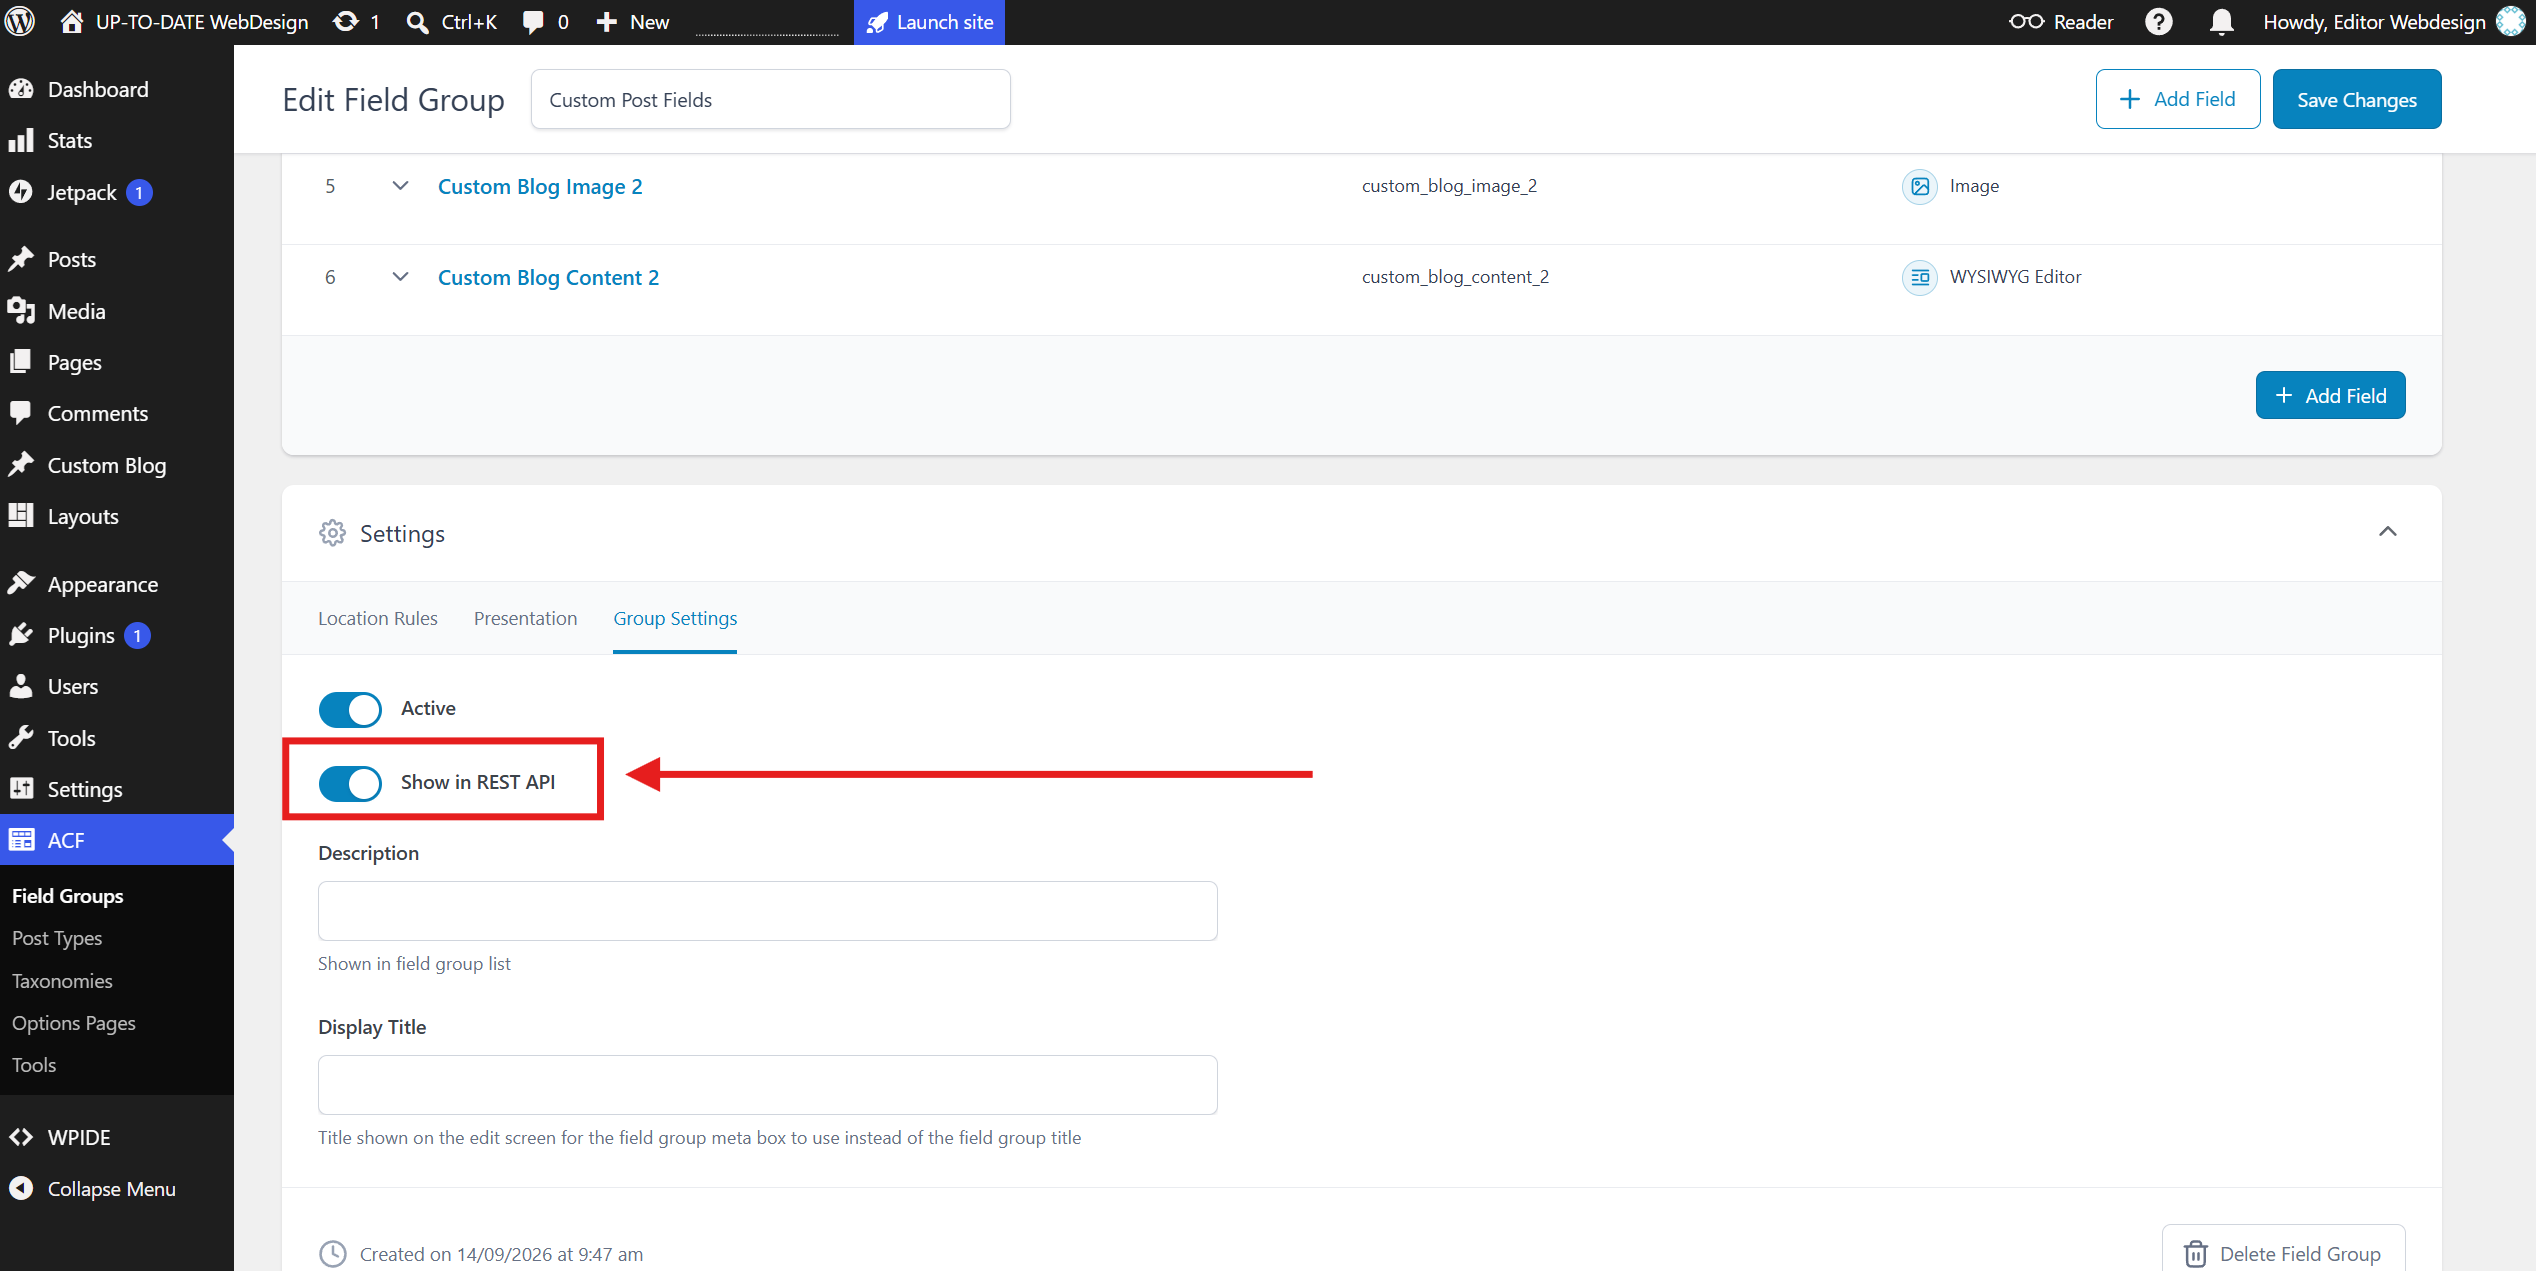
IMPORTANT: Once the field group is confirmed ensure that Show in REST API is enabled. This can be found under the Field Group Settings > Group Settings > Show in REST API. If this is not enabled, the field groups will not be seen by the API and will not copy the values.
Common field types you'll run into
Text / Textarea / WYSIWYG — regular text content
Image / Gallery — media
This list is what you'll compare against our editor's content model in the next step.
Step 4: Configuring ACF Posts
By this point, you know three things: whether the site uses ACF, what post type the blog uses, and what fields ACF expects. Now it's time to plug all of that into our app.
Connect the site
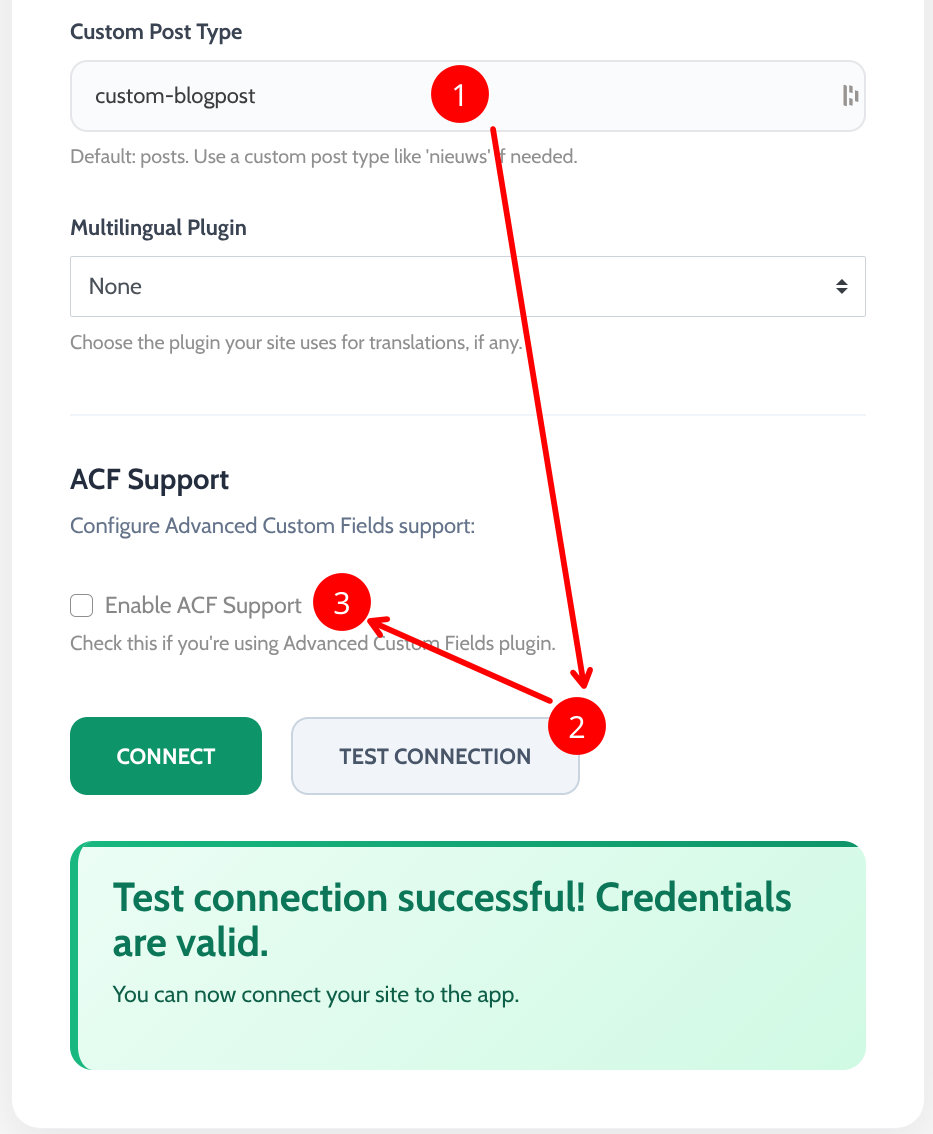
Fill in the site connection details as usual, including the blog post content settings. Additionally, if the posts use a custom post type, fill in the Custom Post Type input with the post type key.
Test the connection.
If the connection succeeds, a new option appears: Enable ACF Support. Turning this on opens the ACF Schema Editor. If the posts do not need ACF but is using a custom post type, ACF support must also be enabled.
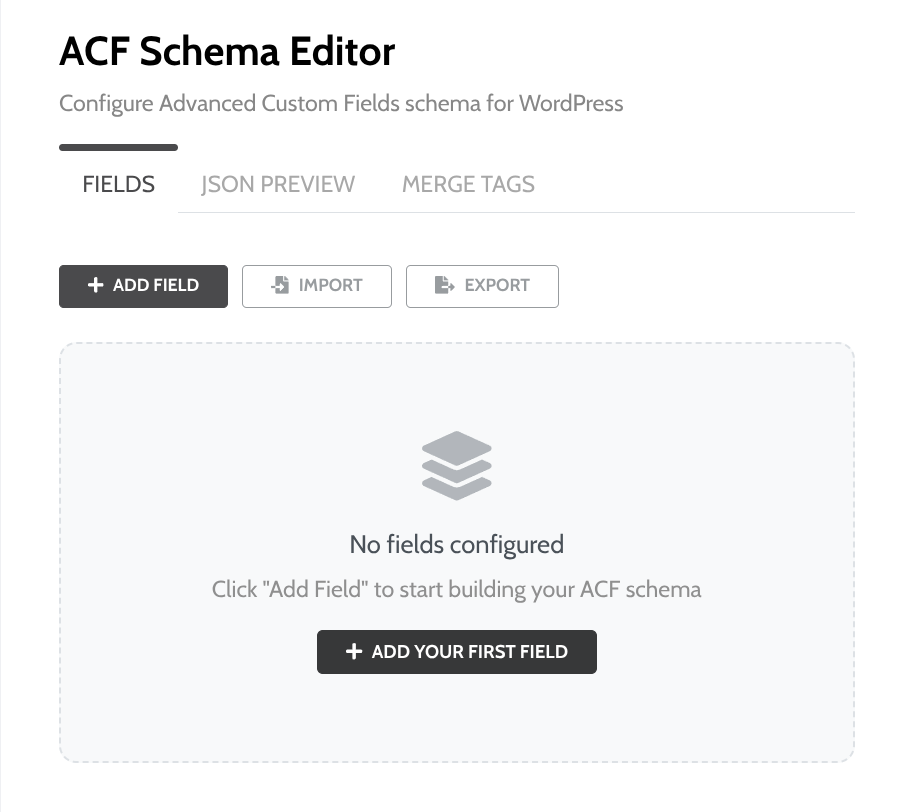
What the Schema Editor Does
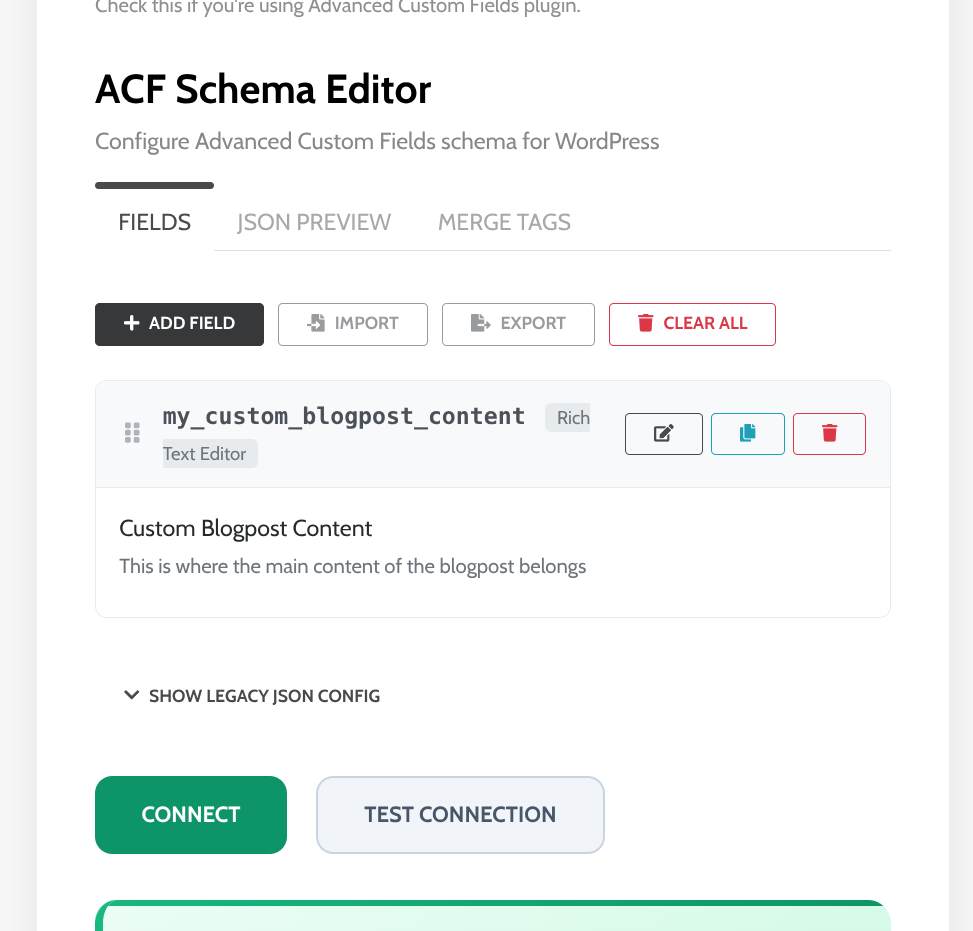
Once ACF support is turned on, the Schema Editor takes the place of our app's normal blog post editor. Instead of writing into one big content box, your team fills in the exact fields the site's ACF setup expects, the same fields you found back in Step 3.
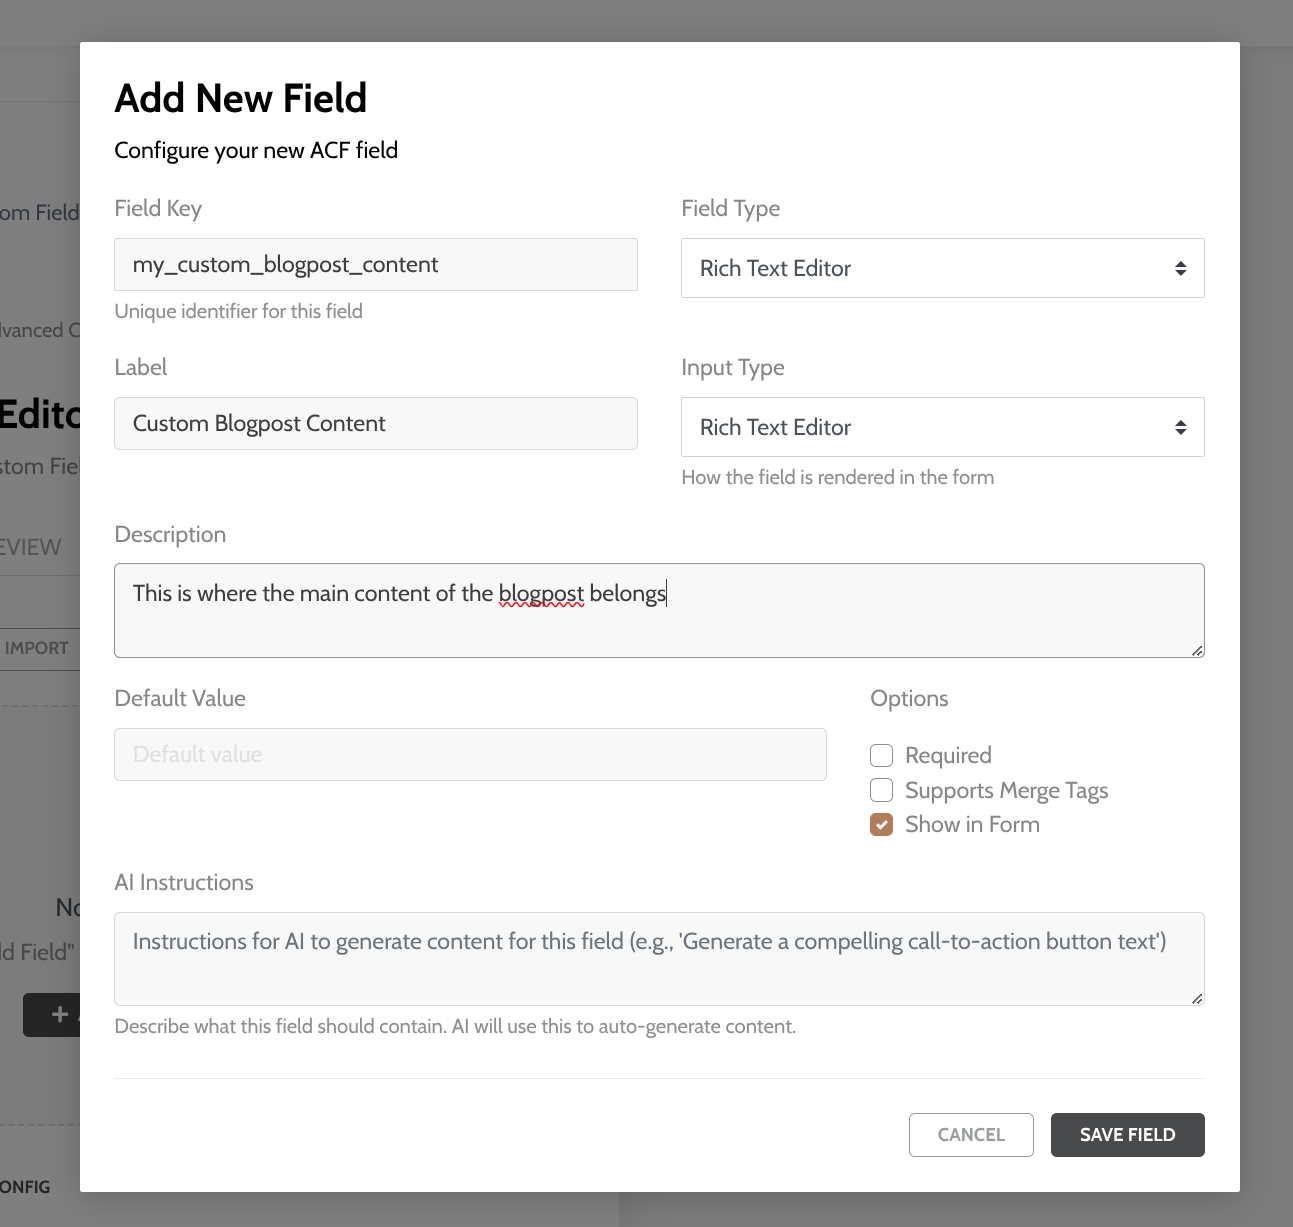
Fill in these four things:
Field Key — Must match the ACF field's key exactly. It's how our app knows which WordPress field this connects to. If this doesn't match, the content won't land in the right place.
Field Type — The type registered in ACF (for example, Rich Text Editor, Text, or Image). This should match what you found while reviewing field groups in Step 3.
Label — What your team sees when writing a post in our editor. This is just for your team's clarity, it doesn't need to match anything on the WordPress side.
Input Type — Controls how the field actually renders inside our blog post editor. Along with Field Type, this decides what your writers see and interact with while writing.
Optionally, you may add a default value for a field for when the user doesn't add any content to that field of the blogpost.
Merge Tags
In the options panel, you will find the Supports Merge Tags option. This allows the default value to accept the content of the default blogpost editor. A merge tag selector will appear beside the input for the Default Value. When doing this, it is recommended to disable "Show in Form" as to prevent any conflict in the content.
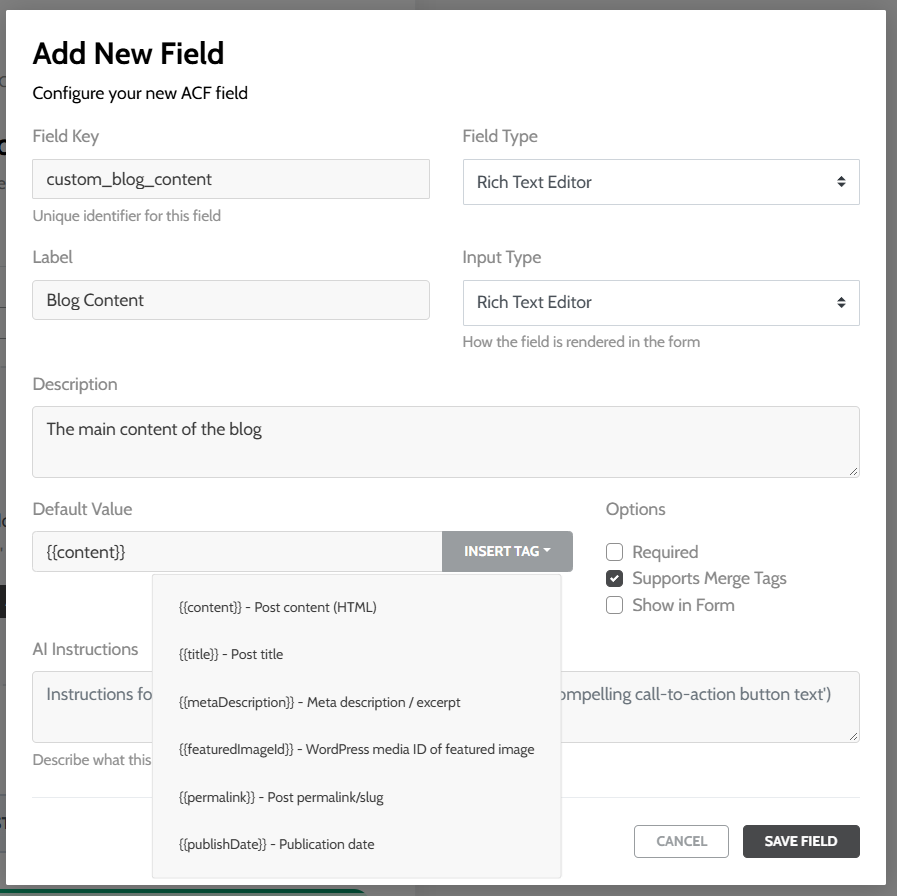
Once you save, the field appears in the Schema Editor's list and is ready to use.